Connect Shopify to Rankauto
Connecting Rankauto to your Shopify store turns a finished draft into a published blog post with one click. The featured image is downloaded and re-hosted straight onto Shopify’s own CDN, and the SEO title and meta description are written to Shopify’s real SEO fields automatically, so there is no copying content into the blog editor by hand.
Before you begin
Make sure you have:
- Admin access to your Shopify store, to create a custom app
- At least one blog set up under Content → Blog posts in your Shopify admin
Connecting your Shopify store
Shopify requires a small custom app on your own store first — it takes about five minutes and stays private to your store, no app-store listing or review involved.
dev.shopify.com/dashboard, click Create app, and name it something you’ll recognize later, for example “Rankauto”.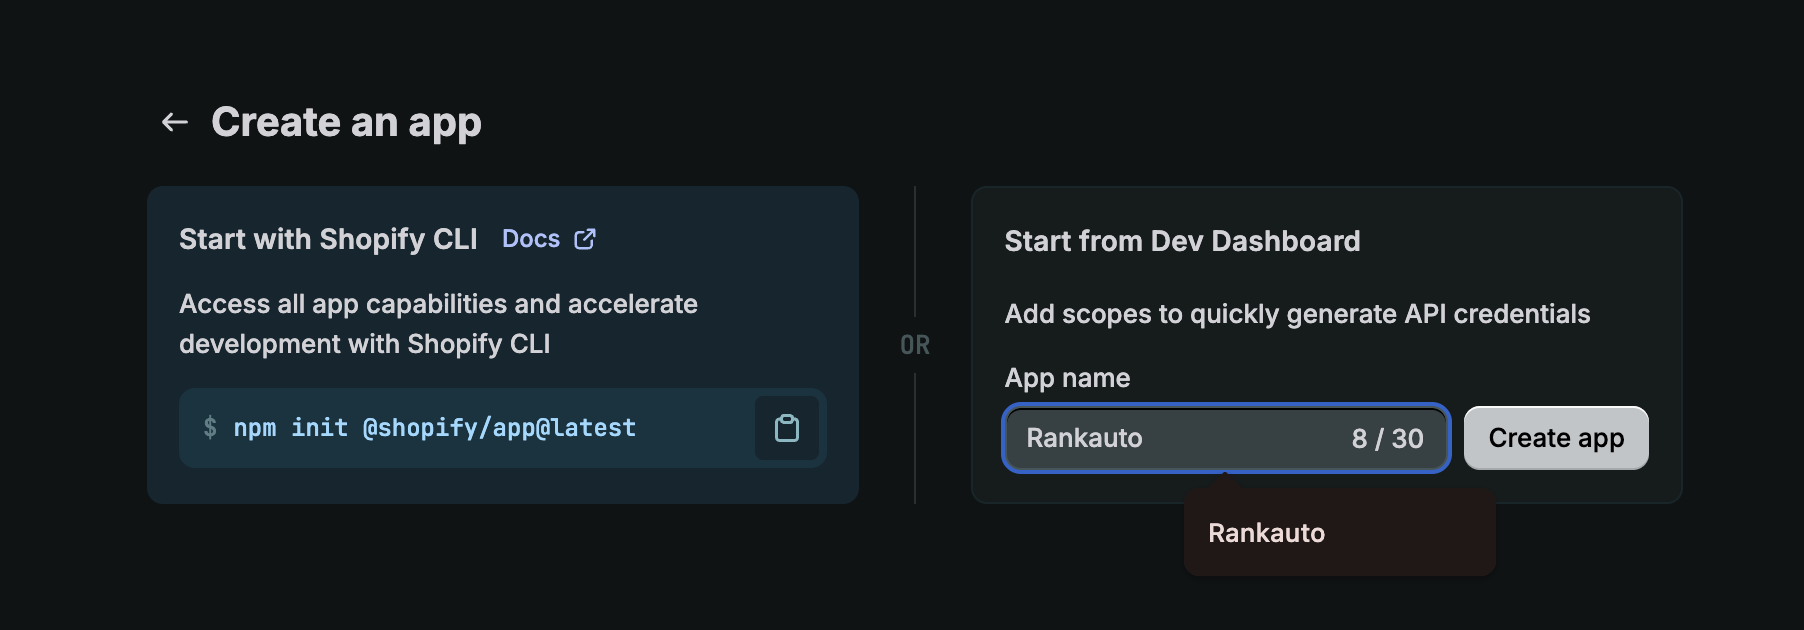
read_content and write_content, then click Release to create the app’s first version.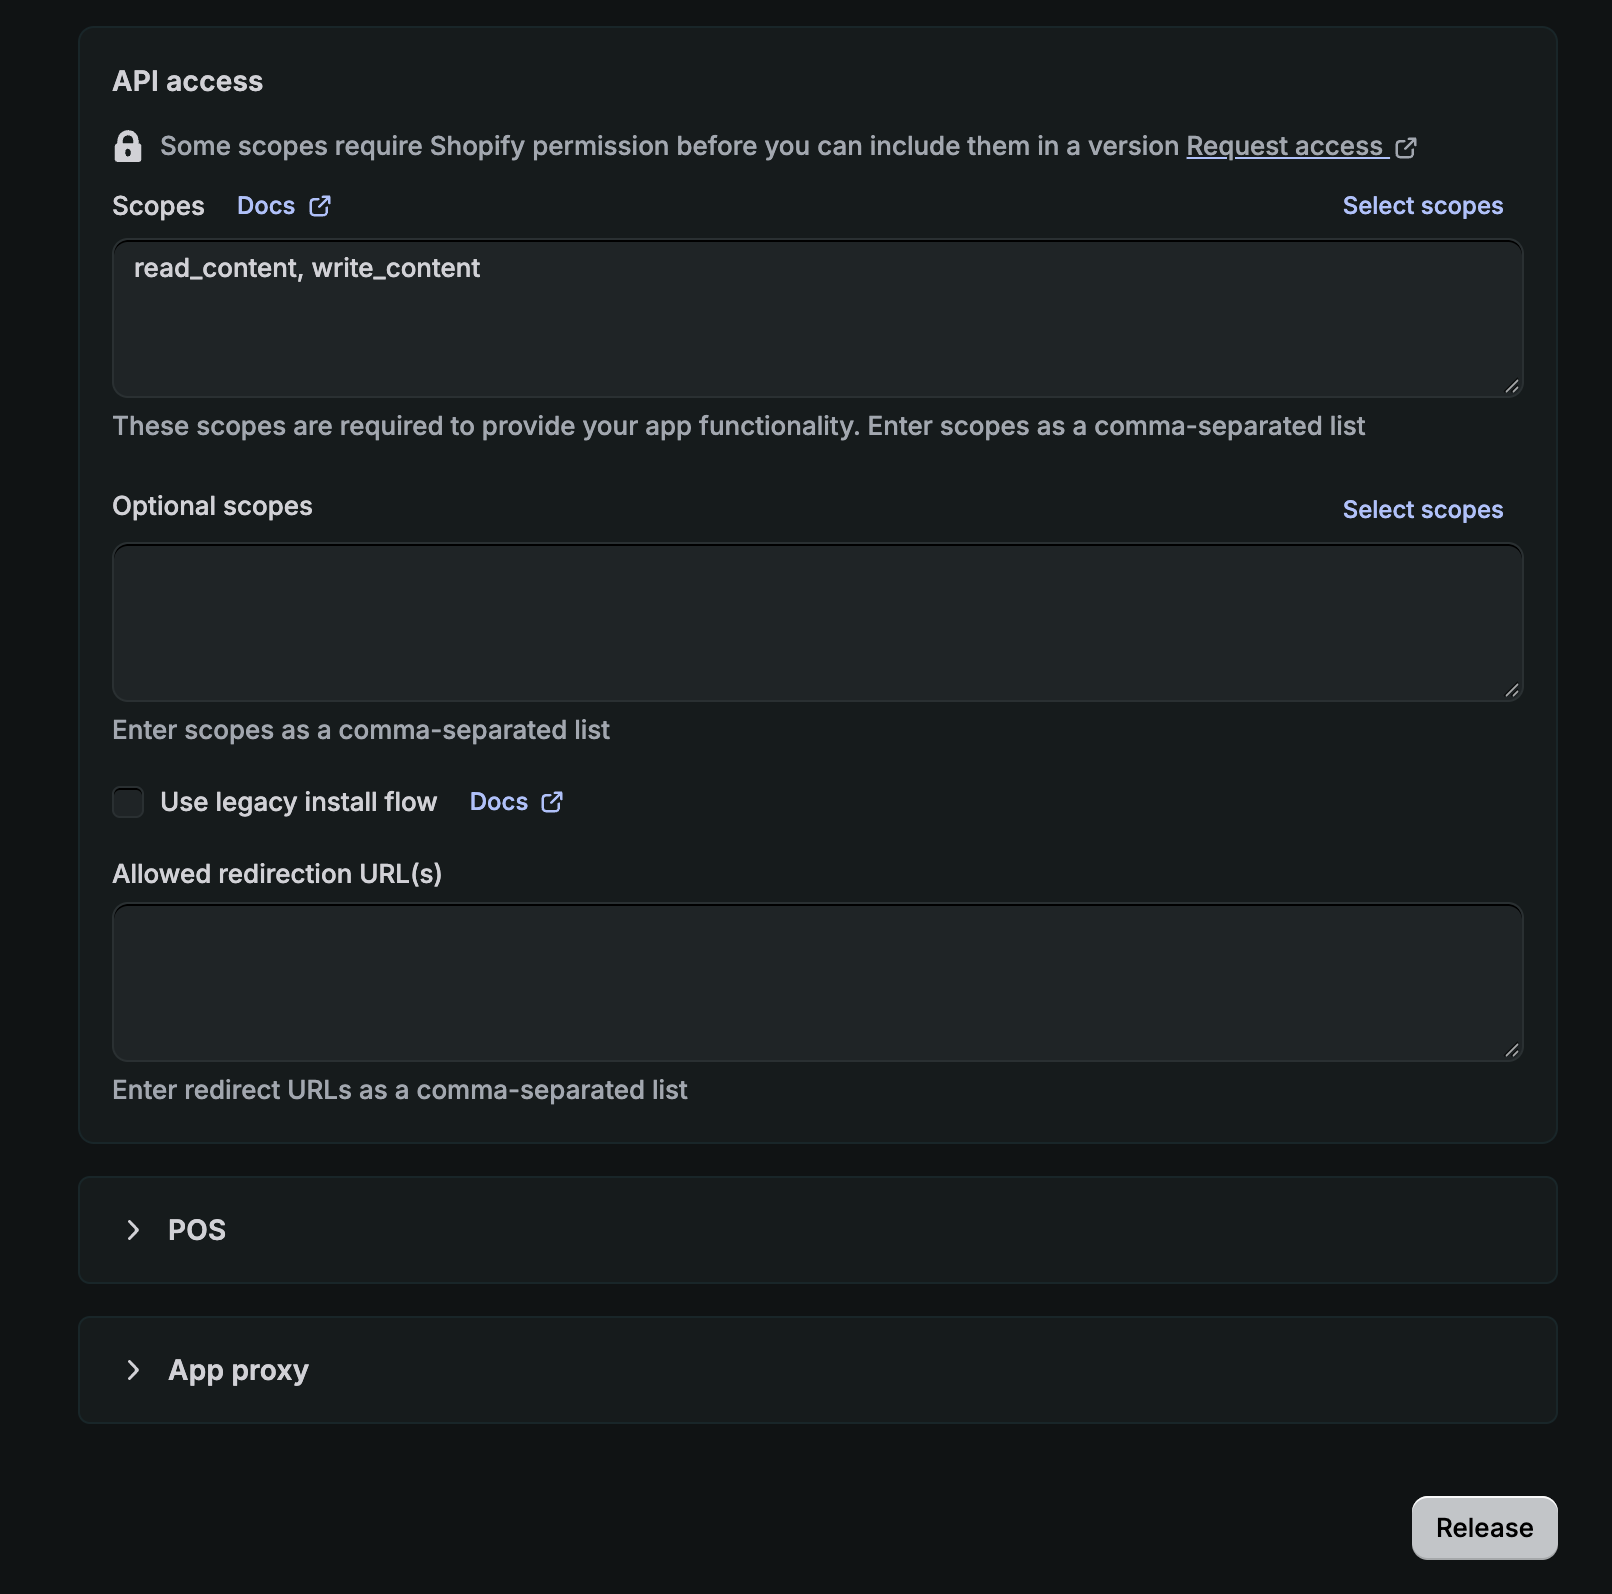
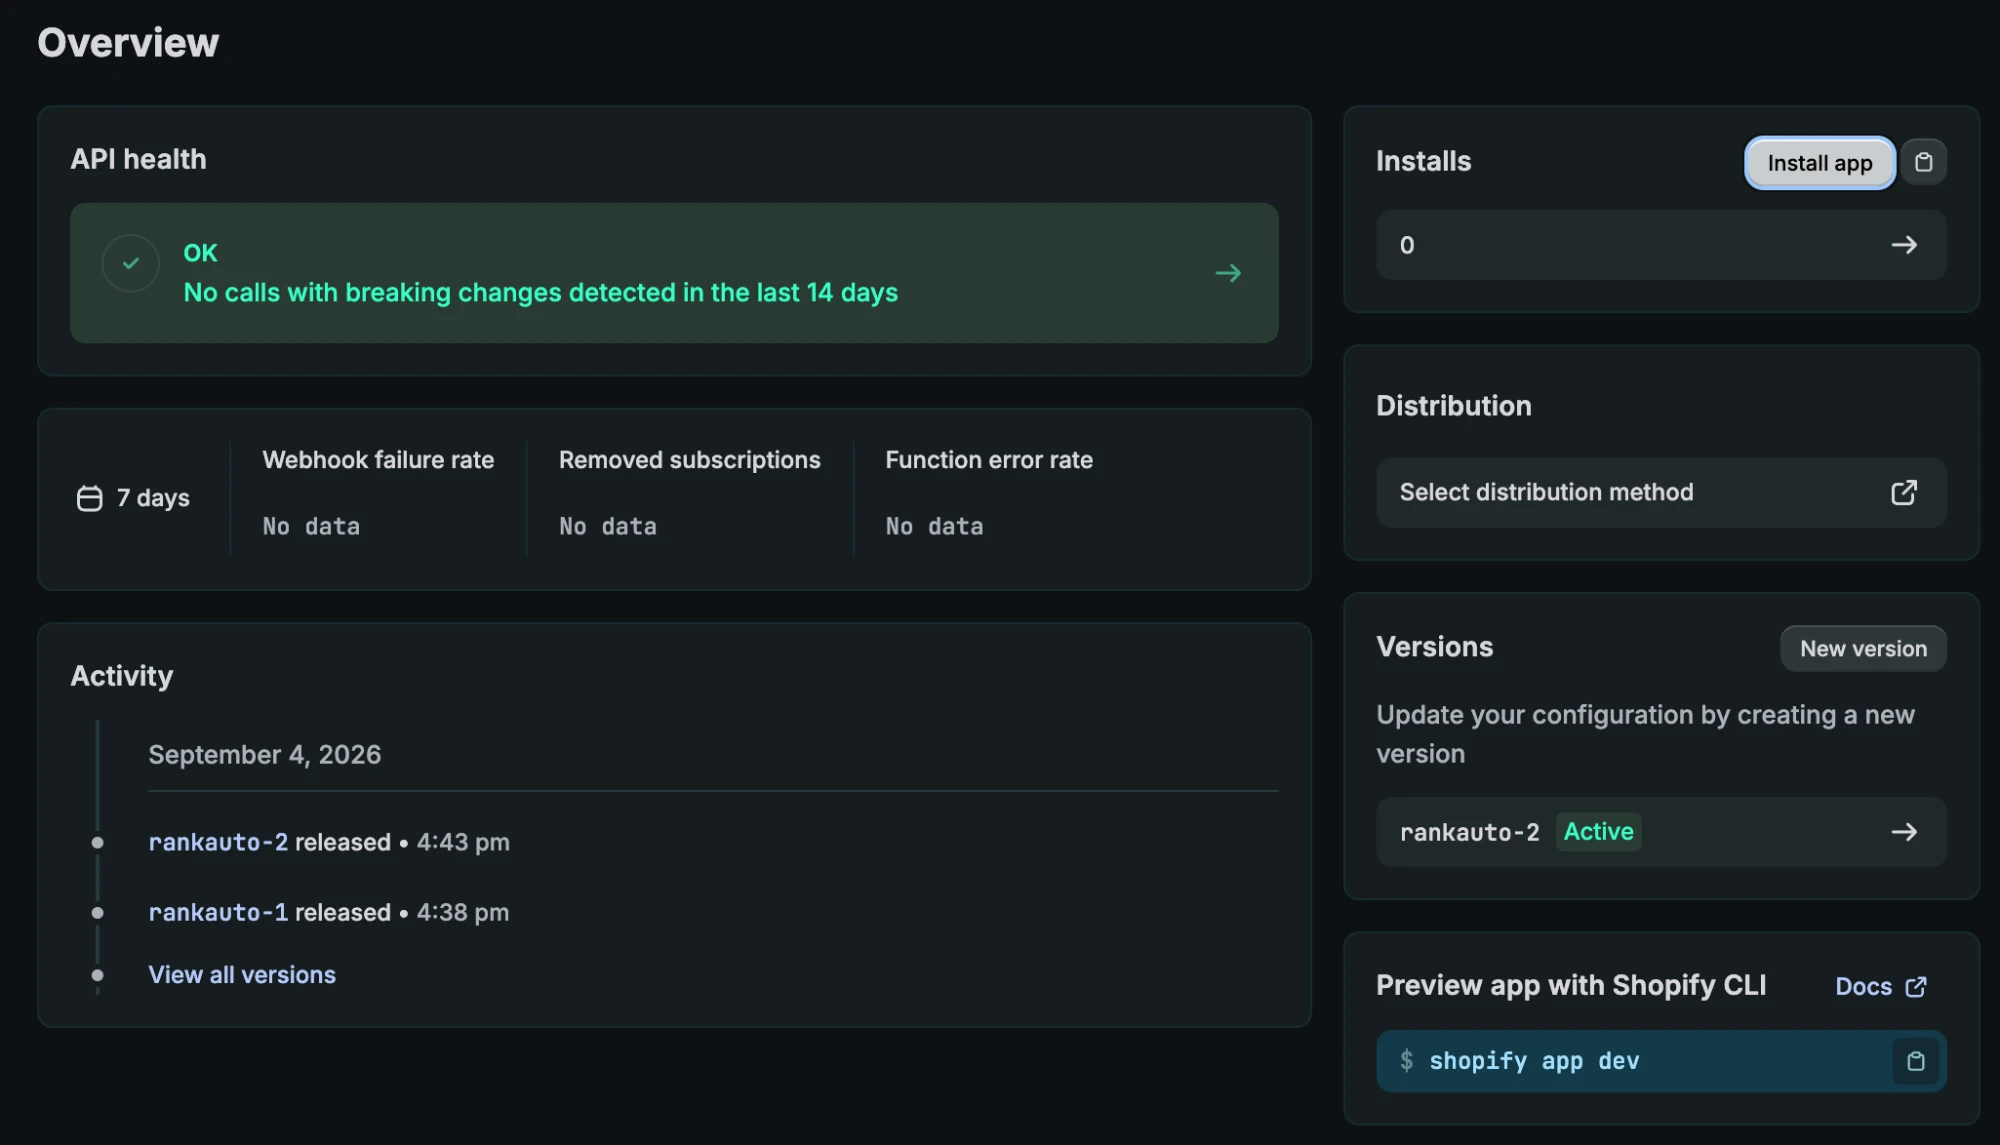
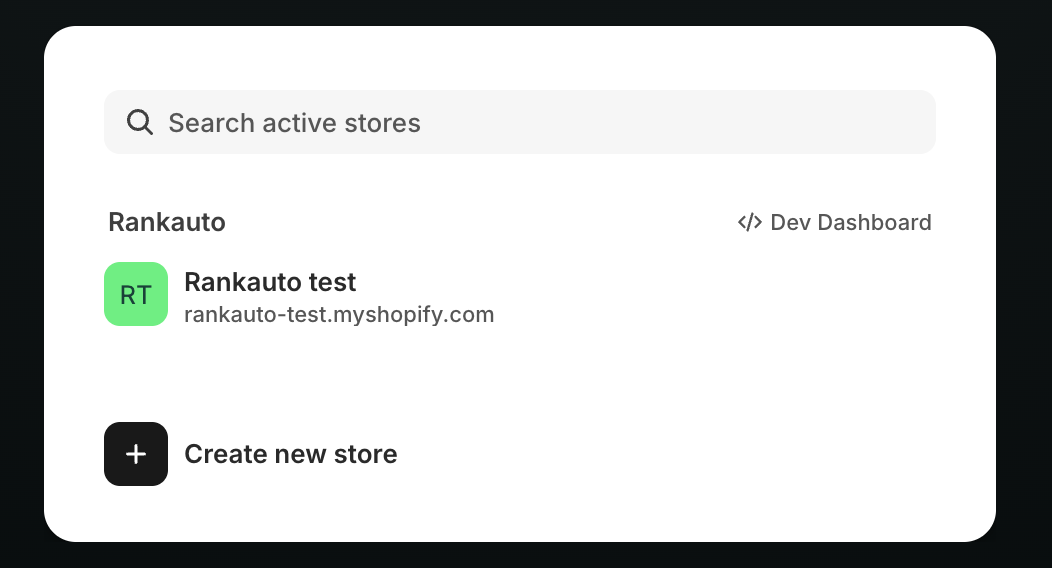
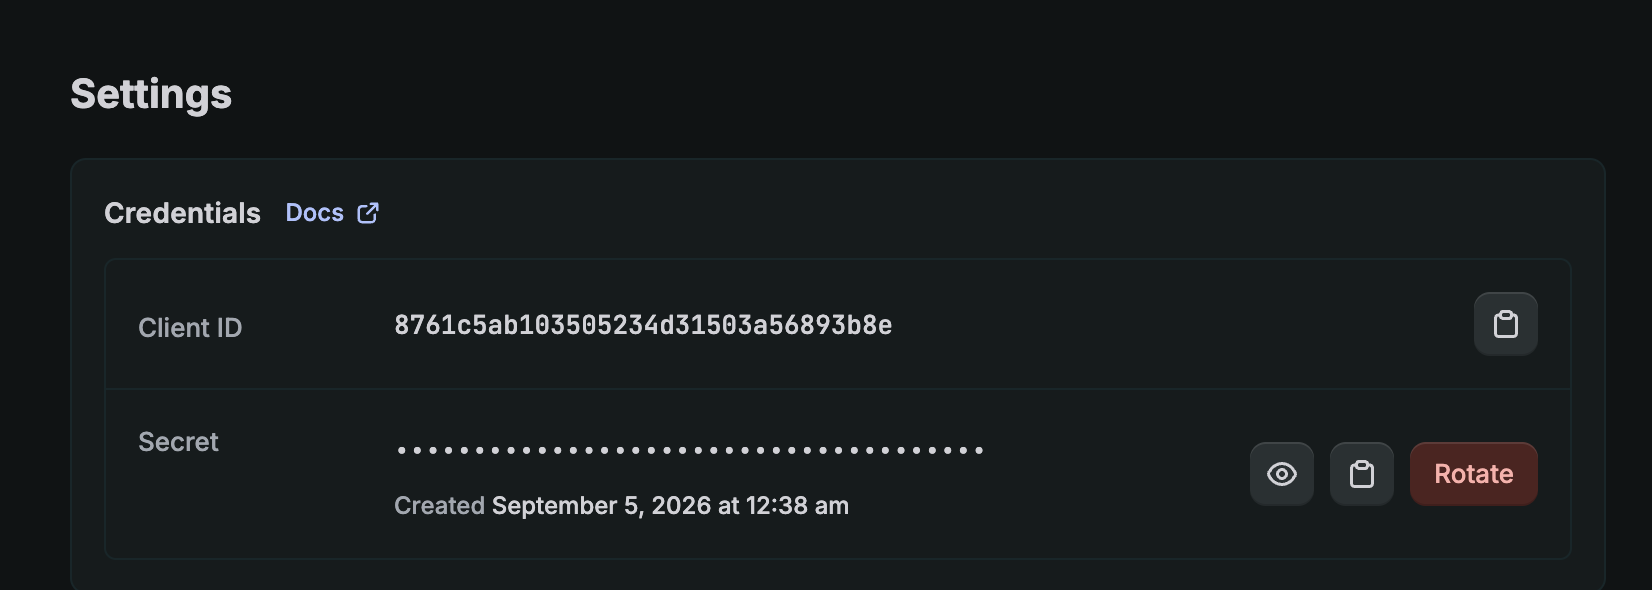
.myshopify.com URL along with those credentials, and click Test Connection — Rankauto fetches your store’s real blogs so you can pick which one to publish to, then click Connect Shopify.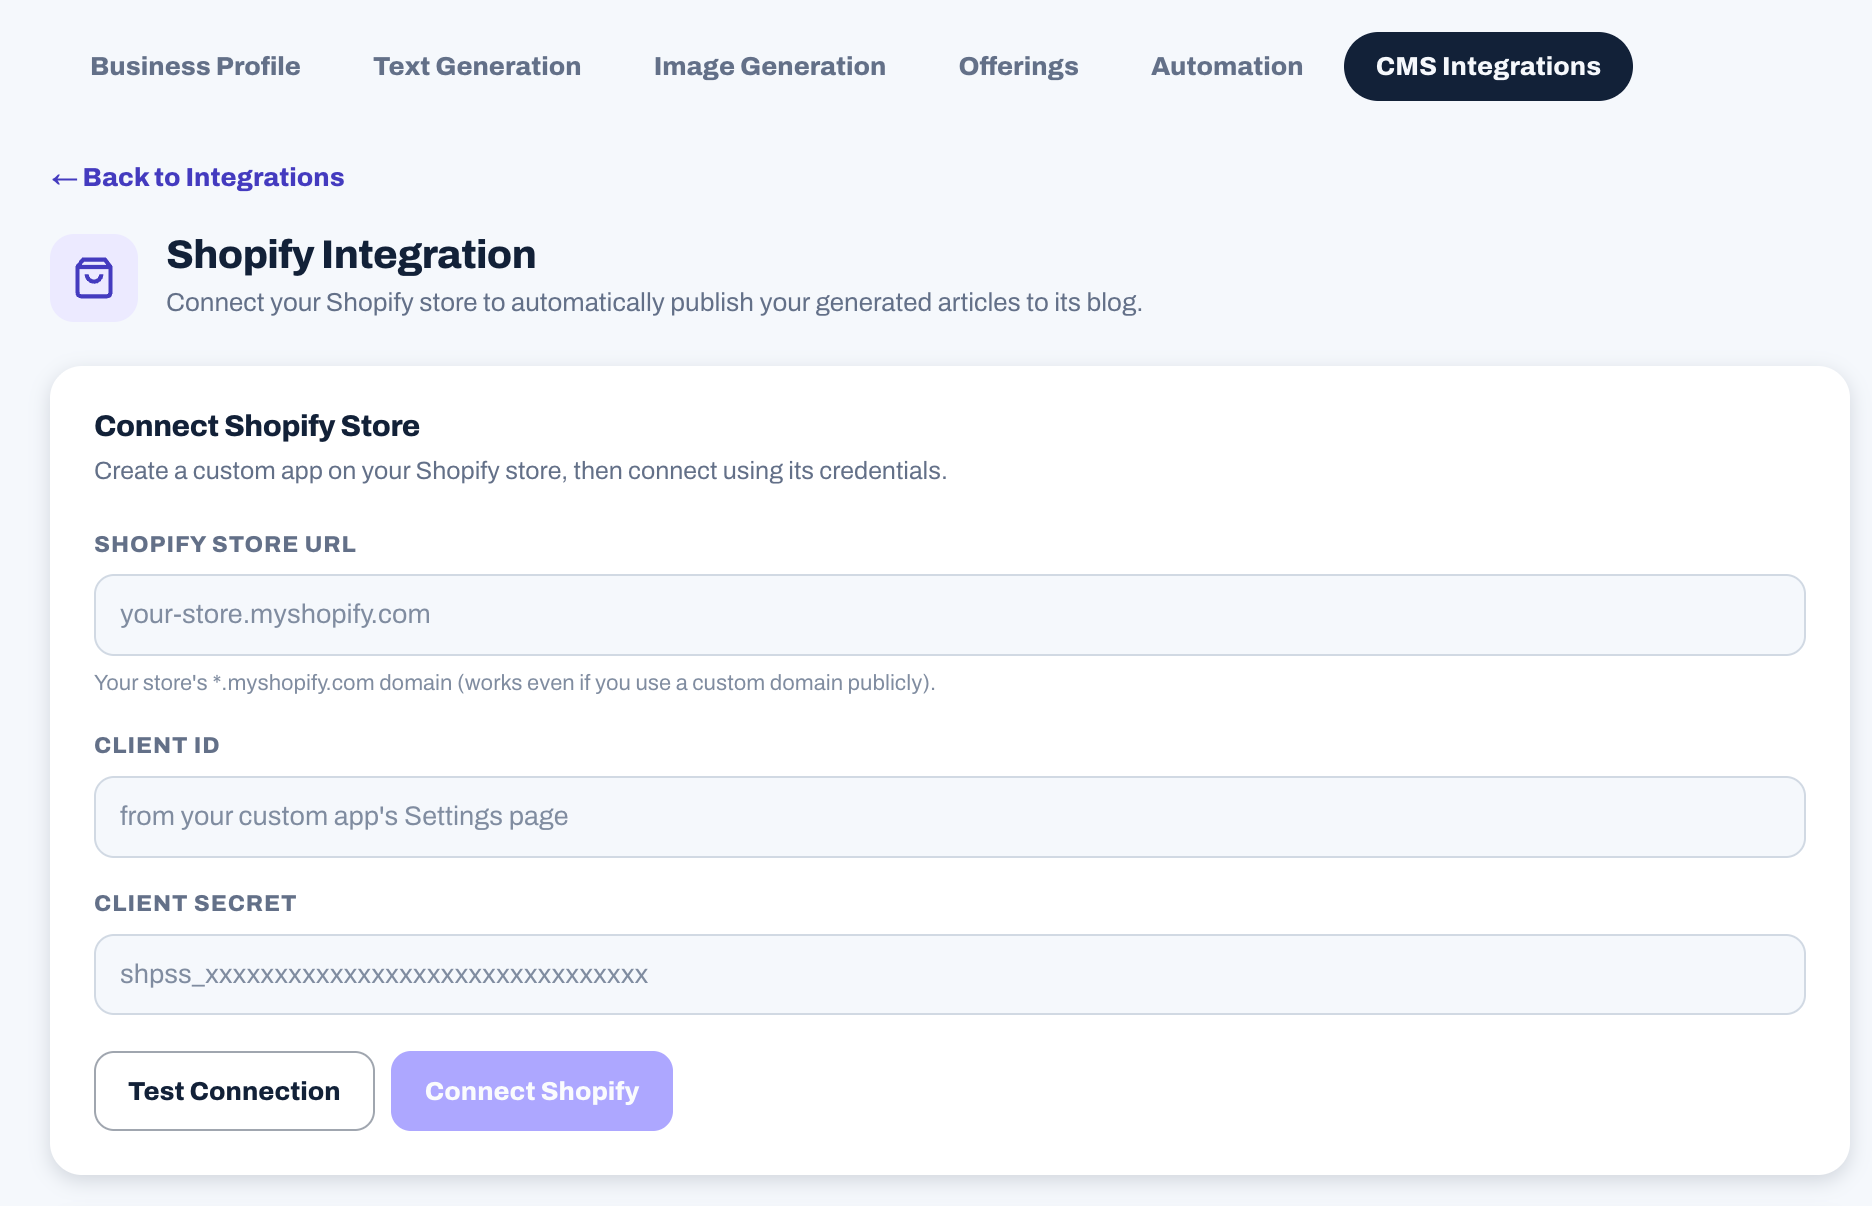
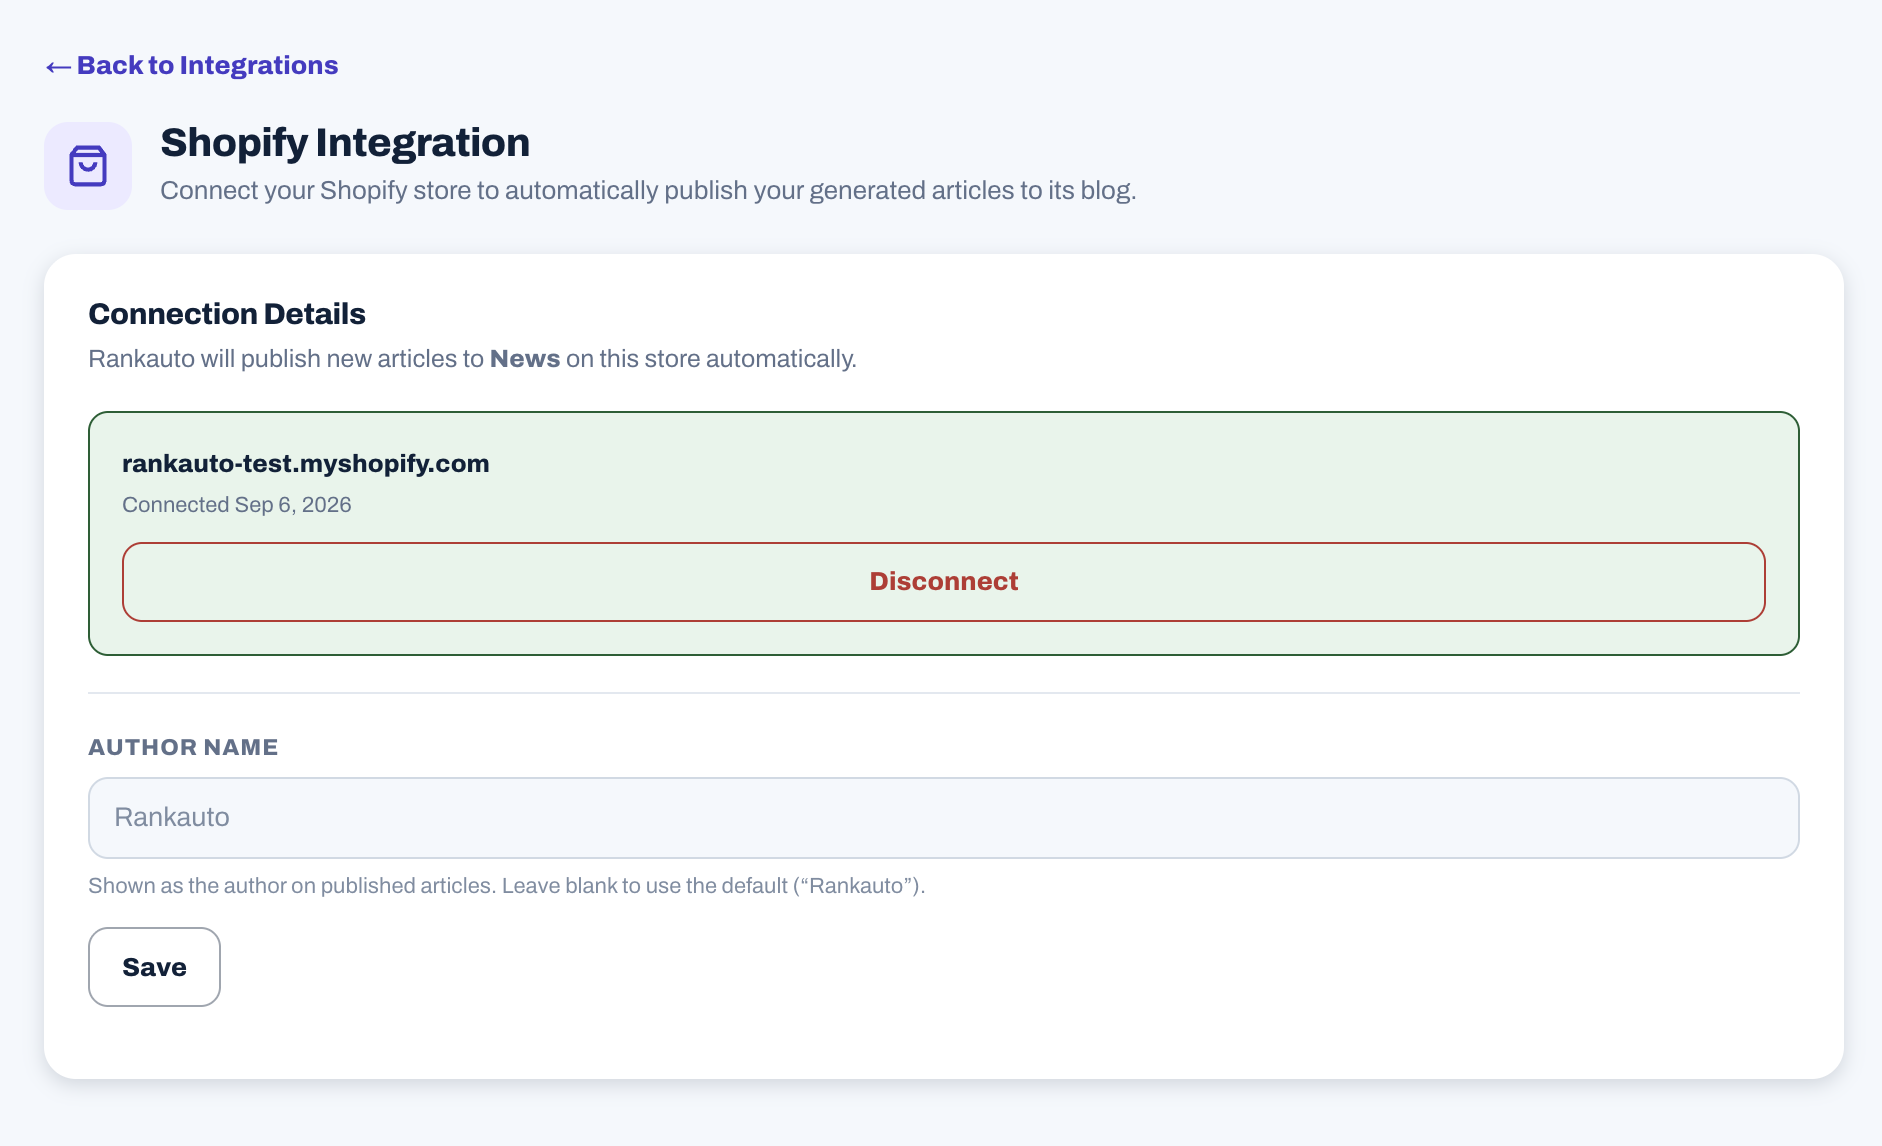
Once connected, open any drafted article in Rankauto and click Publish Now. Rankauto formats the article, re-hosts the featured image on Shopify’s own CDN and writes the SEO fields, all in one request.
Updating published articles
After an article is published to Shopify, editing it in Rankauto and clicking Publish Now again updates the same blog post in place. Rankauto keeps track of which Shopify article it created, so nothing gets duplicated.
What gets set automatically
Every article Rankauto publishes to a connected Shopify store includes:
- A featured image, downloaded and re-hosted directly onto Shopify’s own CDN — no separate media upload step
- An SEO title and meta description, written to Shopify’s real
global.title_taganddescription_tagmetafields (the fields Shopify’s own theme and SEO apps read) - The article’s body content, URL handle, and the blog you chose during setup
Customizing published content
Choosing which blog
A Shopify store can have more than one blog — “News”, “Blog”, or a custom name you’ve created. Rankauto asks you to pick one during setup. To publish to a different blog later, disconnect and reconnect from Settings → CMS Integrations → Shopify, picking the new one.
Store URL format
Always connect using your store’s real .myshopify.com address, even if your storefront runs on a custom domain — that’s the one Shopify’s own admin API authenticates against.
Troubleshooting
My connection failed. What should I check?
Confirm you’re using your store’s real .myshopify.com URL, not a custom domain. Double-check the Client ID and Client Secret match exactly what’s shown on the app’s own Settings page in the Shopify Dev Dashboard.
I don’t see any blogs after clicking Test Connection.
Make sure the app was actually installed on the store in step 3, and that the store has at least one real blog under Content → Blog posts in Shopify.
My articles aren’t publishing.
Check whether the custom app is still installed on your Shopify store — an uninstalled app immediately breaks the connection. Reconnect from Settings → CMS Integrations → Shopify if needed.
Can I use my store’s custom domain to connect?
No — always use your real .myshopify.com address for the connection itself. Rankauto still publishes correctly even when your storefront is on a custom domain.
Frequently asked questions
Can I connect more than one Shopify store?
No. Connecting a new site or platform replaces whichever CMS is currently connected. Disconnect the new one and reconnect the old one if you need to switch back.
Where do published articles show up?
Go to Content → Blog posts in your Shopify admin. Articles appear in the blog you chose during setup.
Will articles show up on my live store right away?
Yes. Clicking Publish Now pushes an article live immediately. If you’d rather your scheduled daily articles publish on their own, turn on Auto Publishing under Settings → Automation, it’s off by default.
What happens if I uninstall the custom app from Shopify?
The connection stops working immediately. Articles already published stay live on your store, but Rankauto can’t publish or update anything until you create a new custom app and reconnect.
Can I switch to a different blog later?
Yes. Disconnect from Settings → CMS Integrations → Shopify, then reconnect and pick a different blog.
Other integrations
Set up Rankauto on another platform.
Ready to publish straight to Shopify?
Connect your store from Settings once you’re signed in, or start a free trial to try the whole workflow end to end.
Start 3-day free trial